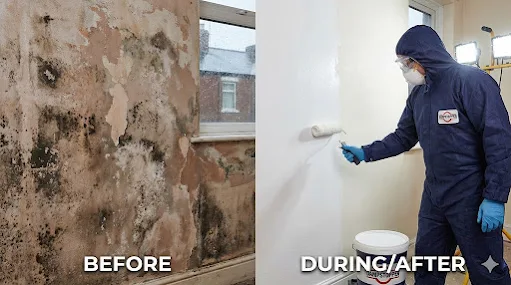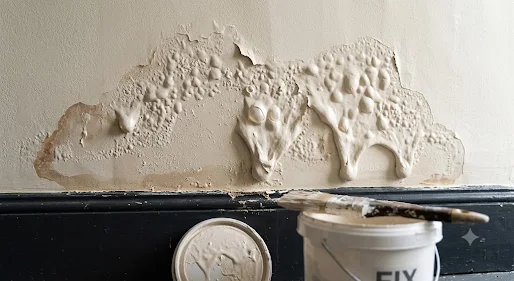
The quick answer is no. You cannot use damp proof or damp seal paint over a live, actively damp wall with standard paint. Doing this traps moisture inside the wall. The wetness will quickly break the paint’s bond, causing the new layer to bubble, crack, and peel off within a few weeks. It also creates a hidden breeding ground for toxic black mould.
You can paint the wall successfully only after you follow three steps:
- Find and stop the source of the water.
- Let the wall dry out 100%.
- Use a specialist primer and the correct paint.
Why Painting Over Damp Walls Is a Bad Idea
Trying to slap a quick cosmetic coat over a wet wall always backfires. Here is exactly what happens if you paint over damp walls:
- Paint Blistering: Room heating turns the trapped wall moisture into water vapour. This vapour expands behind the paint film, creating hollow, ugly air bubbles.
- Peeling and Flaking: Paint needs a dry, stable surface to grip. On a wet wall, it simply sits on a layer of moisture, loses its stickiness, and falls away in large flakes.
- Rapid Mould Growth: Trapped moisture and darkness are exactly what black mould needs to thrive. Covering it hides the problem while letting the fungus spread out of sight.
- Structural Wood Rot: Sealing the front of a wall forces the water to travel sideways into your floorboards, skirting boards, and structural timbers, leading to costly dry rot.
- Ugly Water Stains: Natural minerals and salts inside the bricks travel with the water. They will bleed right through standard emulsion, leaving nasty yellow or brown rings on your new paint job.
How to Tell If a Wall Is Too Damp to Paint
Never trust a surface that just looks dry. Before you start applying damp stop over damp walls, check for these clear warning signs:
- Damp Patches: Darker areas on the plaster that feel noticeably cold to the touch.
- Musty Smells: An earthy, damp odour that means mould or mildew is actively growing nearby.
- Flaking Paint: Paint or plaster that easily crumbles into dust when you press it with your thumb.
- Efflorescence: A white, powdery, or furry salt residue left on the surface as water evaporates.
Two Simple Ways to Test the Moisture Levels:
- The Plastic Sheet Test: Tape a 30 by 30 cm square of clear plastic kitchen wrap over the suspect area. Seal all four edges tightly with painter’s tape. Leave it for 24 to 48 hours. If water droplets form on the inside of the plastic, the wall is still drying out and is too wet to paint.
- The Moisture Meter Test: For absolute certainty, press the metallic prongs of a digital pin-type moisture meter directly into the plaster. A reading below 10% to 12% Wood Moisture Equivalent (WME) means the wall is completely dry and safe to paint. Anything over 15% means you need to wait.
How to Fix Damp Walls Before Painting
To stop your new damp proof paint from peeling away, you must follow a proper damp wall preparation routine. Here is how to fix damp walls before painting:
- Find the Source: Figure out where the water is coming from. Is it condensation (steamy air inside), penetrating damp (rain leaking through the outer wall), or rising damp (groundwater soaking upward)?
- Repair the Leaks: Fix broken gutters, patch up damaged outside brickwork, replace slipped roof tiles, or repair any leaking water pipes.
- Improve Ventilation: Open your window trickle vents, run a dehumidifier, and install high-extraction fans in your bathroom and kitchen to clear out humid air.
- Treat the Mould: Scrub away all visible mould using a dedicated biocidal fungal wash. Do not use standard washing-up liquid or soap, as these contain organic elements that actually feed mould spores.
- Allow Drying Time: Give the wall plenty of time to air out naturally.
- Repair the Plaster: Rake out loose, hollow, or crumbling plaster. Fill the holes with a moisture-stable wall filler and sand it completely smooth.
- Prime the Surface: Use a high-quality blocking primer to lock away historical water stains.
How Long Should You Leave a Damp Wall Before Painting?
How long you need to wait depends entirely on how deeply the water soaked into the structure.
- Minor Condensation: If the wall only had superficial surface wetness from a steamy shower, it will usually dry out within 24 to 48 hours once you turn on a fan or open a window.
- Penetrating Damp: Brickwork soaked by a long-term external leak holds an immense amount of water. As a benchmark, solid brick walls dry out at a slow rate of 1 inch (25mm) of wall thickness per month. A standard 9-inch solid wall can take 6 to 9 months to dry completely.
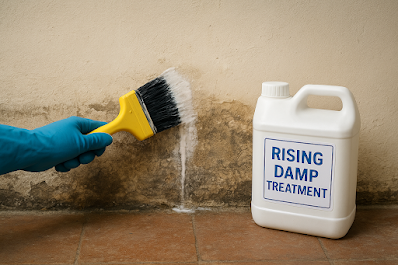
- Rising Damp: After a professional damp-proof course (DPC) injection, the lower wall remains deeply saturated. Expect to wait several months for the trapped brickwork moisture to fully evaporate.
- Replastered Walls: If you had to hack off old, salt-damaged plaster and apply a fresh skim coat, let it cure for a minimum of 3 to 4 weeks before priming. Painting too early traps the construction water used to mix the plaster.
What Kind of Paint Should You Use on Damp Walls?
Knowing what damp proof paint to use on damp walls is the difference between a job that lasts for years and one that fails instantly.
- Damp Seal Paint: A tough, solvent-based primer designed to stick to old damp patches. It seals in dried water stains and prevents leftover mineral salts from bleeding into your topcoat.
- Anti-Mould Paint: A decorative paint mixed with special fungicides. It stops airborne mould spores from growing on surfaces that get hit with high condensation (like bathroom ceilings).
- Breathable Masonry Paint: Best for exterior walls or older stone and lime-plaster properties. It allows moisture inside the wall to escape into the air naturally instead of trapping it.
- Standard Emulsion: Standard wall paint should only be used as a final decorative coat after the wall is 100% dry and a damp seal primer has been applied.
💡 Unsure which product to buy for your home? To avoid wasting money on cheap formulas that flake off, see our comprehensive guide to the best damp seal paints for UK homes, where we compare and rank the most effective options for interior and exterior walls.
Step-by-Step Guide to Painting a Previously Damp Wall
Once the leak is fixed and your moisture meter confirms the wall is dry, finish your project using this step-by-step sequence:

1. Clean and Sanitise the Surface
Scrape off all loose, damp stop paint, white salt crusts, and loose plaster. Scrub the entire area with an anti-fungal wash to kill deep-seated mould spores.
2. Dry the Room Completely
Close the doors and windows, and run a domestic dehumidifier for several days until the plaster registers safely under 12% moisture.
3. Repair Surface Cracks
Fill in all holes and gouges with a high-strength interior filler. Let it dry completely, sand it flush with the wall, and vacuum away the dust.
4. Apply the Damp Seal Primer
Stir your damp seal paint thoroughly. Paint a generous coat over the affected area, extending it about 20cm past the old edges of the damp patch.
5. Allow the Primer to Cure
Leave the damp seal to dry for 4 to 12 hours (check your specific tin). This gives the product time to form a solid, liquid-blocking barrier.
6. Apply the Top Decorative Coat
Finish the wall with two coats of your standard decorative emulsion or anti-mould topcoat. Keep the windows open while it dries.
Common Mistakes to Avoid
- Painting Before the Wall Dies Out: A wall can feel dry on the outside while remaining soaking wet on the inside. Rushing the process guarantees the damp stop paint will peel.
- Ignoring the Core External Leaks: Retail damp paints cannot stop structural water pouring in from the outside. You must fix the brickwork or roof first.
- Skipping the Stain-Blocking Primer: Painting standard wall emulsion straight over an old water stain will cause the yellow watermark to bleed through your new damp proof paint within 48 hours.
- Using Cheap Contract Paint: Low-quality contract matt damp proof paint lacks the binders and protective qualities needed to handle areas prone to moisture.
- Painting Over Active Mould: If you paint over black mould without killing the spores first, the fungus will simply eat the ingredients in the new paint and grow right back through.
Frequently Asked Questions (FAQ)
How do you fix damp walls before painting?
Stop the source of the water first (repair gutters, roofs, or outer bricks). Next, kill any mould with a biocidal spray, scrape away damaged plaster, allow the wall to dry out fully, and seal the area with a specialist damp seal primer.
What kind of paint do you use on damp walls?
Use a solvent-based damp seal primer to block old stains and residual moisture. For topcoats in humid rooms like bathrooms, use a high-quality anti-mould paint containing active fungicides.
How long should you leave a damp wall before painting?
Surface dampness from everyday condensation can dry in 24 to 48 hours. Deep penetrating damp inside thick brick walls takes much longer, drying out at a general rate of about one inch of wall thickness per month.
What happens if you paint over damp walls?
The damp stop paint cannot stick to the wet surface, which causes it to blister, bubble, and peel away in sheets. It also traps moisture inside the brickwork, leading to permanent water stains and rapid black mould growth.
How can I tell if my wall is too damp to paint?
Look out for cold patches, flaking paint, musty smells, or powdery white salt crusts. For absolute proof, run a 48-hour plastic sheet test or test the plaster with a digital pin-type moisture meter to ensure readings are below 12% WME.